

₨2,100
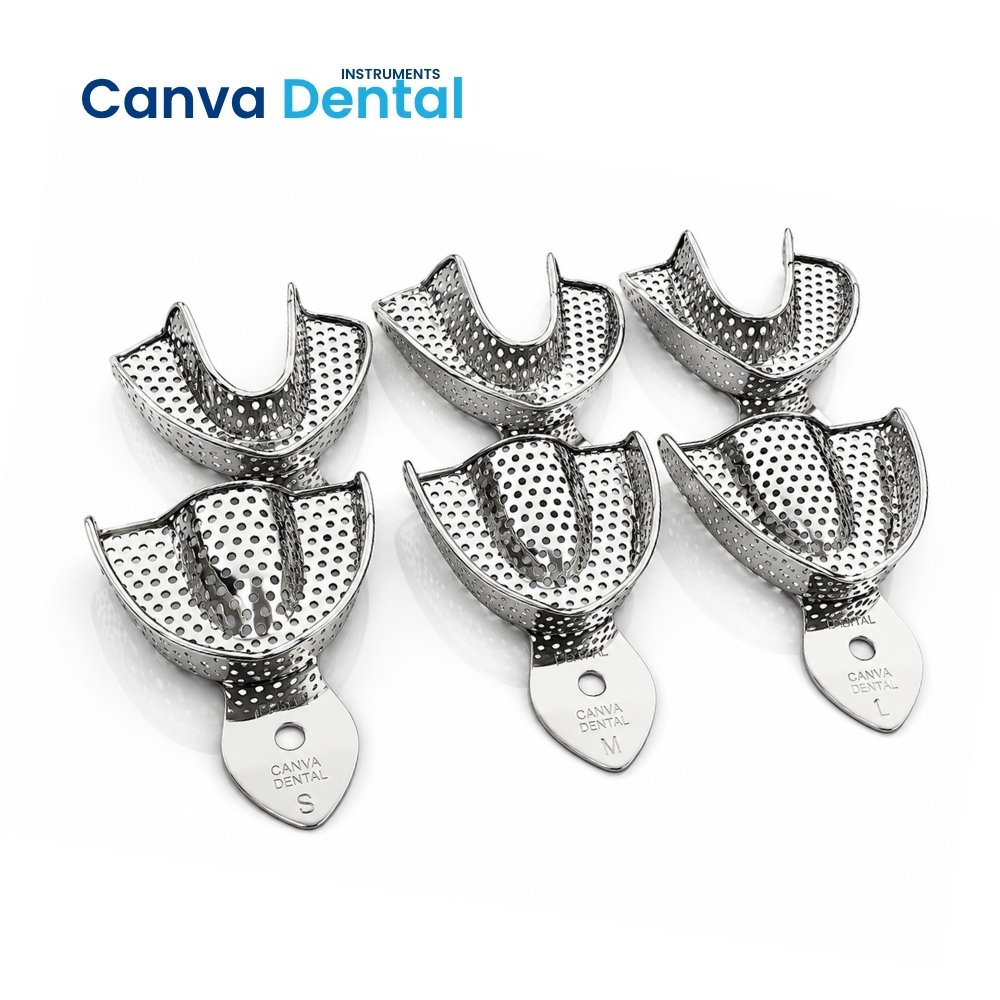
Set of 6 pcs
An Impression Tray is one of the most fundamental instruments in dental practice. Clinicians use this instrument to carry impression material into the patient’s mouth, hold it in precise contact with the teeth and soft tissues, and support the material while it sets — producing an accurate negative reproduction of the oral anatomy. Because the accuracy of every prosthetic, orthodontic, and restorative treatment depends directly on impression quality, selecting and using the correct impression tray is a critical clinical decision at every appointment.
Furthermore, the Impression Tray determines how well the impression material adapts to tooth surfaces, how much material distortion occurs during removal, and ultimately how precisely the laboratory model reproduces the patient’s oral anatomy. Therefore, understanding impression tray types, parts, sizes, and material compatibility helps every dental professional achieve consistently accurate impressions across all clinical procedures.
A dental impression tray is a rigid or semi-rigid carrier that holds impression material in position against the teeth and soft tissues during the impression-taking procedure. As a dental impression tray, it performs three simultaneous functions — containing the impression material within a defined volume, positioning the material precisely against the structures being recorded, and supporting the set material during and after removal from the mouth.
Without a properly fitting dental impression tray, the impression material would flow uncontrolled, produce uneven thickness across the arch, and lack the support needed to resist distortion during withdrawal. Consequently, tray selection represents the first and most important decision in every impression-taking procedure — preceding material selection, technique choice, and all other procedural variables.
Understanding the parts of impression tray design helps clinicians appreciate how each component contributes to impression accuracy, material retention, and patient comfort. Every dental impression tray consists of the following main parts:
| Part of Impression Tray | Location | Function |
|---|---|---|
| Body / Tray Floor | Central base of the tray | Carries and supports the bulk of the impression material across the arch |
| Rim / Peripheral Wall | Outer border surrounding the tray floor | Confines impression material within the tray volume during seating |
| Handle | Anterior midline projection | Allows clinician grip for tray insertion, positioning, and removal from the mouth |
| Perforations | Multiple holes in tray floor and walls | Mechanical retention of impression material — prevents material separation from tray on removal |
| Posterior Stop | Posterior rim of the tray | Prevents over-seating — maintains consistent material thickness over occlusal surfaces |
| Palatal Coverage (Upper) | Roof of upper tray | Covers hard palate to record full upper arch anatomy including rugae |
| Lingual Flange (Lower) | Inner lingual border of lower tray | Extends beneath tongue to record lingual anatomy and floor of mouth |
Each impression tray in our range combines dimensional accuracy, material compatibility, and clinical durability that repeated clinical use demands:
Several types of impression tray exist, each designed for specific clinical procedures, impression materials, and patient requirements. Therefore, understanding the available types helps clinicians select the most appropriate tray for every clinical situation:
| Type | Material | Design Feature | Primary Use |
|---|---|---|---|
| Stock Perforated Tray | Stainless steel | Pre-made with perforations | Alginate, PVS — general prosthetic and orthodontic impressions |
| Stock Non-Perforated Tray | Stainless steel | Solid walls, uses adhesive | Zinc oxide eugenol, heavy PVS wash impressions |
| Custom Impression Tray | Acrylic / light-cure resin | Patient-specific fit | Final prosthetic impressions — dentures, implant-level impressions |
| Disposable Plastic Tray | Polystyrene / PP plastic | Single-use, perforated | Alginate study models, bleaching trays, orthodontic records |
| Sectional Impression Tray | Stainless steel / plastic | Divided into segments | Patients with limited mouth opening, gag reflex cases |
| Triple Tray (Dual Arch) | Plastic mesh frame | Records both arches simultaneously | Single tooth crown and bridge impressions |
| Edentulous Tray | Stainless steel | No occlusal stops — flat base | Complete denture impressions — upper and lower |
| Quadrant Tray | Stainless steel / plastic | Covers half arch only | Posterior quadrant crown and bridge impressions |
Dental impression tray sizes follow a standard small-medium-large-extra-large classification for both upper and lower arch trays. However, because arch width, arch length, and palatal depth vary significantly between patients, size selection requires direct clinical assessment rather than estimation.
A correctly fitting dental impression tray leaves approximately 3–5mm of clearance between the tray walls and the outermost tooth surfaces on all sides — enough space for an adequate impression material thickness without the tray contacting any tooth or tissue directly. Because inadequate clearance produces thin, distortion-prone impression material over critical areas, tray fit assessment before material loading is a non-negotiable step in every impression procedure.
| Tray Size | Arch Width | Typical Patient |
|---|---|---|
| Small (S) | Narrow arch | Small adults, most children, crowded arches |
| Medium (M) | Average arch | Most adult patients — most commonly used size |
| Large (L) | Wide arch | Large adults, broad arched patients |
| Extra Large (XL) | Extra wide arch | Large male patients, wide maxillary arches |
| Paediatric | Deciduous arch | Children with primary dentition |
Understanding the full range of impression tray uses helps dental teams appreciate how critical this instrument is across every clinical discipline. Although alginate study model impressions represent the most frequent application, impression tray uses extend across virtually every area of modern dental practice:
Clinicians choose between a stock impression tray and a custom impression tray based on the procedure type, required accuracy level, and clinical workflow. Moreover, understanding the differences helps dental teams decide when each type delivers sufficient accuracy and when upgrading to a custom tray is clinically justified:
| Feature | Stock Impression Tray | Custom Impression Tray |
|---|---|---|
| Fit precision | Approximate — selected by size | Exact — fabricated on patient’s study model |
| Material thickness | Variable — may be uneven | Uniform — 2–3mm controlled thickness |
| Impression accuracy | Adequate for most procedures | Superior — required for final dentures and implants |
| Cost | Low — reusable stainless steel | Higher — single-use acrylic construction |
| Chair time | Immediate — no fabrication needed | Requires prior study model and tray fabrication |
| Best applications | Study models, crowns, orthodontics, bleaching | Final denture impressions, implant-level records |
Therefore, most dental practices stock a full range of stock impression tray sizes for routine daily procedures, while reserving custom tray fabrication for final prosthetic impressions where material thickness uniformity and border extension accuracy directly determine prosthesis fit quality.
Different impression tray materials suit different impression materials, and selecting the correct combination prevents the most common impression failures — material separation from the tray, tray distortion during removal, and inadequate material retention. The following compatibility guide covers the most widely used impression materials in Pakistan and internationally:
| Impression Material | Recommended Tray Type | Retention Method |
|---|---|---|
| Alginate | Perforated stock tray | Mechanical — perforations |
| Polyvinyl Siloxane (PVS) | Perforated stock or custom tray | Adhesive + perforations |
| Polyether | Custom or non-perforated stock tray | Adhesive |
| Zinc Oxide Eugenol | Custom tray with border moulding | Adhesive |
| Plaster of Paris | Non-perforated stock tray | Mechanical undercuts |
| Condensation Silicone | Perforated stock or custom tray | Adhesive + perforations |
Because stainless steel impression trays contact oral mucosal tissue and saliva at every appointment, thorough sterilization between patients is non-negotiable. Fortunately, all stainless steel impression trays in our range withstand repeated autoclave cycles at 134°C without dimensional change, perforation distortion, or surface corrosion.
However, clinicians should inspect trays before each use for bent rims, distorted handles, or blocked perforations — all of which compromise tray performance and impression accuracy. Additionally, ultrasonic cleaning before autoclaving removes residual impression material from perforations effectively, since blocked perforations reduce mechanical retention and increase the risk of material separation during impression removal.
Similarly, many healthcare professionals follow hygiene and sterilization guidance shared by the American Dental Association regarding clinical safety and surgical instrument maintenance.
We supply a comprehensive range of dental impression trays — including perforated and non-perforated stainless steel stock trays in all sizes for upper and lower arches, edentulous trays, paediatric trays, and triple trays — to dental clinics, prosthetic laboratories, orthodontic practices, teaching hospitals, and dental instrument distributors across Lahore, Karachi, Islamabad, Multan, Peshawar, Faisalabad, Rawalpindi, and all major cities in Pakistan. Furthermore, our institutional supply team supports bulk procurement for dental colleges and hospital dental departments at competitive pricing.
Contact our team for current impression tray pricing in Pakistan, available sizes and types, and delivery timelines for your practice or institution.
Q: What are the main parts of an impression tray?
The main parts of impression tray design include the body or tray floor that carries impression material, the peripheral rim that confines material within the tray volume, the anterior handle for insertion and withdrawal, the perforations that provide mechanical material retention, the posterior stop that prevents over-seating, the palatal coverage on upper trays, and the lingual flange on lower trays that records floor-of-mouth anatomy.
Q: What are the different types of impression tray?
The main types of impression tray include stock perforated trays for alginate and PVS, non-perforated stock trays for adhesive-retained materials, custom impression trays for final prosthetic accuracy, disposable plastic trays for single-use procedures, edentulous trays for complete denture impressions, triple trays for crown and bridge dual-arch recording, sectional trays for patients with limited mouth opening, and paediatric trays for children.
Q: What is the difference between a stock impression tray and a custom impression tray?
A stock impression tray comes in pre-made sizes selected by approximate arch fit — suitable for most routine procedures including study models, crowns, and orthodontic records. A custom impression tray is fabricated directly on a patient’s study model, providing exact fit, uniform material thickness, and superior border extension accuracy. Custom trays are essential for final complete denture impressions and implant-level records where fit precision directly determines prosthesis outcome quality.
Q: How do I select the correct dental impression tray size?
Always try the tray dry in the patient’s mouth before loading impression material. A correctly fitting dental impression tray leaves approximately 3–5mm of clearance between tray walls and all tooth surfaces. The tray should cover all teeth and retromolar pads without contacting any tooth directly, extend 2–3mm beyond the most distal tooth, and sit comfortably without pressing on soft tissue. Begin with medium size for most adult patients and adjust based on the dry try-in assessment.
Q: Which impression materials work best with a perforated stock impression tray?
Alginate works best with perforated stock impression trays because its viscosity allows it to flow through perforations during seating and lock mechanically after setting. PVS materials also work well with perforated trays when tray adhesive is applied first. However, zinc oxide eugenol and polyether materials require non-perforated custom trays with adhesive retention because their flow properties and setting characteristics do not suit perforation-based mechanical retention.
For complete clinical setups, explore all dental instruments here: CLICK
Reviews
There are no reviews yet.