

₨2,500
The Gracey Curette is the gold standard curette instrument in periodontal practice worldwide. Periodontists, general dentists, and dental hygienists use Gracey curettes to remove supragingival and subgingival calculus, smooth root surfaces, and eliminate bacterial biofilm from periodontal pockets. Because thorough root planing is the foundation of all periodontal treatment, the Gracey Curette set is the most important instrument collection in any periodontal practice.
Furthermore, Gracey curettes differ fundamentally from all other curettes. Each instrument in the set addresses a specific tooth surface and arch position. As a result, the complete Gracey set covers every surface of every tooth in the mouth — from the mesial of the upper right central incisor to the distal of the lower left third molar — without any instrument improvisation or surface compromise.
A curette instrument is a double-ended periodontal hand instrument. It has a curved, spoon-shaped blade with one or two cutting edges. Clinicians insert the blade subgingivally into the periodontal pocket. They then apply lateral pressure against the root surface and pull the instrument coronally. This motion scrapes calculus deposits and contaminated cementum from the root surface. Consequently, the root surface becomes clean and smooth — a prerequisite for periodontal ligament reattachment.
Moreover, the curette instrument differs from a sickle scaler. A sickle scaler has two cutting edges on a straight or curved pointed tip. It suits supragingival calculus removal only. In contrast, the curette has a rounded toe and a curved blade. This design allows safe subgingival insertion without soft tissue laceration. As a result, curettes are the preferred instrument for all subgingival instrumentation across all pocket depths.
Specifically, Clayton Gracey was an American periodontist who developed his curette series in the 1930s and 1940s. He identified a fundamental limitation of all curettes available at the time. Universal curettes could access any tooth surface but could not adapt precisely to the complex root anatomy of posterior teeth. Specifically, posterior tooth roots have concavities, furcations, and curvatures. These features require a curved blade set at a specific angle for optimal root surface adaptation. Therefore, Gracey designed a series of area-specific curettes. Each one has a blade offset specifically for one tooth surface and arch position. As a result, the Gracey set produces superior root surface debridement compared to any single universal curette used across the full arch.
Furthermore, the single most important distinction between the Gracey Curette and a universal curette is the blade offset. A universal curette has its blade set at 90° to the lower shank. Consequently, the clinician uses both cutting edges on any tooth surface by changing the instrument angulation. In contrast, the Gracey Curette has its blade set at 70° to the lower shank — an offset angle. This offset means only the lower cutting edge is the working edge. Furthermore, the offset angle positions the working edge correctly on the target root surface automatically — without the clinician needing to adjust angulation on each stroke. As a result, the Gracey Curette produces more consistent blade-to-root adaptation with less technique variation between operators.
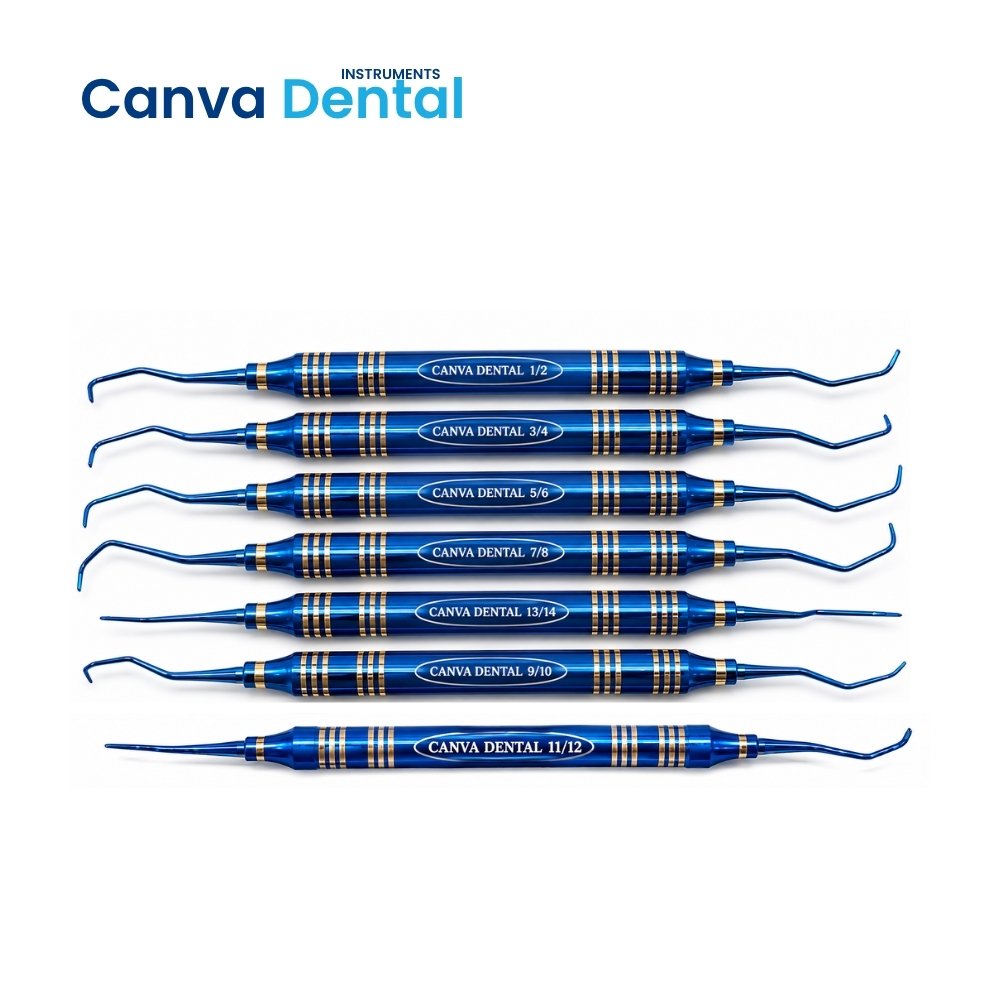
Specifically, the gracey curette types follow a numbered series from Gracey 1/2 through to Gracey 17/18. Each number pair designates a double-ended instrument. The two ends of each pair are mirror images. Together they cover both the mesial and distal surfaces — or both the buccal and lingual surfaces — of the designated tooth group. Consequently, the full Gracey set consists of nine paired instruments covering every tooth surface across the full dentition systematically.
Specifically, Gracey 1/2 and 3/4 suit anterior teeth — upper and lower incisors and canines. Their shanks are relatively straight with a minimal offset. This straight shank allows the blade to enter anterior tooth pockets without the shank contacting the adjacent teeth. Furthermore, Gracey 1/2 accesses all surfaces of anterior teeth with its moderate shank curvature. Gracey 3/4 is similar but has a slightly different shank geometry. As a result, many clinicians use only Gracey 1/2 for all anterior surfaces and reserve Gracey 3/4 for specific access challenges.
Moreover, Gracey 5/6 bridges the gap between anterior and posterior instrument regions. It accesses all surfaces of anterior teeth and premolars. Specifically, Gracey 5/6 has a longer terminal shank than Gracey 1/2. This length allows it to reach deeper anterior pockets. Furthermore, the Gracey 5/6 suits premolar buccal and lingual surfaces effectively. Consequently, many clinicians use Gracey 5/6 as their primary anterior instrument and Gracey 7/8 as the transition to posterior coverage.
Furthermore, Gracey 7/8 accesses the buccal and lingual surfaces of posterior teeth — upper and lower premolars and molars. The shank curves more significantly than anterior variants. This curvature allows the blade to adapt to the buccal and lingual convex root surfaces of posterior teeth. Specifically, Gracey 9/10 also suits posterior buccal and lingual surfaces. However, it has a more pronounced shank angulation. This angulation improves access to the upper posterior buccal surfaces specifically. As a result, some clinicians prefer Gracey 9/10 for upper posterior buccal scaling where the 7/8 shank contacts the cheek uncomfortably.
Specifically, Gracey 11/12 is one of the most frequently used instruments in the Gracey set. It accesses the mesial surfaces of all posterior teeth — upper and lower premolars and molars. The shank has a complex double-bend angulation. This double bend positions the blade mesially on the posterior tooth without the shank handle obstructing the operator’s view or the patient’s opposite arch. Furthermore, Gracey 11/12 is the instrument most commonly associated with posterior mesial subgingival debridement in deep pockets. As a result, blade sharpness on Gracey 11/12 is the most critical maintenance priority in any periodontal instrument set.
Moreover, Gracey 13/14 accesses the distal surfaces of all posterior teeth. It is the mirror complement of Gracey 11/12. Specifically, the shank bends in the opposite direction. This reverse bend positions the blade distally on the posterior tooth root. Furthermore, the distal surfaces of second and third molars are among the most difficult surfaces to instrument in the entire mouth. Deep distal pockets on lower second molars require the full shank length of the Gracey 13/14 to reach the subgingival calculus at the base of the pocket. As a result, this instrument demands the most precise insertion technique in the entire Gracey series.
Furthermore, Gracey 15/16 and 17/18 are extended shank variants. They suit deep pockets exceeding 5–6 mm where standard shank lengths cannot reach the base of the pocket. Specifically, Gracey 15/16 is a modified Gracey 11/12 with a longer terminal shank. It accesses mesial surfaces of posterior teeth in deeper pockets. Gracey 17/18 is a modified Gracey 13/14 with extended length for distal posterior access. Moreover, these extended instruments also suit patients with limited mouth opening. As a result, a complete Gracey set includes at minimum the nine standard numbered pairs plus the extended 15/16 and 17/18 for deep pocket and limited access cases.
Specifically, the Gracey Curette blade is offset at 70° to the lower shank. This offset is the defining design feature. It means the blade face tilts toward the root surface when the instrument is inserted correctly. Furthermore, only the lower cutting edge functions as the working edge. The upper edge is not used for scaling. As a result, the working edge automatically adapts to the root surface at the correct angulation for effective calculus removal. This automatic adaptation is the key advantage of area-specific curette design over universal instruments.
Moreover, the blade has a curved, rounded toe at the working end. This rounded toe allows the blade to exit the subgingival pocket at the stroke endpoint without traumatising the junctional epithelium. Furthermore, the blade has a curved cross-section from cutting edge to back. This curve allows the blade face to adapt to the root convexity and concavity in the same stroke. As a result, the Gracey Curette blade contours to the root surface rather than spanning across it — producing more thorough calculus removal per stroke.
Furthermore, the shank of the Gracey Curette has two distinct zones. The terminal shank — the portion closest to the blade — indicates the instrument’s area specificity. When the terminal shank is parallel to the long axis of the tooth, the blade sits at the correct angulation for calculus removal. Specifically, this parallel shank relationship is the clinical indicator that the instrument is correctly positioned before each scaling stroke. As a result, training in Gracey Curette technique always begins with this shank-to-tooth parallel alignment check — before any stroke force is applied.
Specifically, Gracey Curette handles use a lightweight, hollow design. The hollow construction reduces hand fatigue during extended scaling appointments. Furthermore, the handle surface is knurled or textured. This texture maintains secure instrument grip under moisture conditions during subgingival scaling. The handle diameter is calibrated for a modified pen grip — the most sensitive grip for detecting calculus deposits through the blade. As a result, handle weight, diameter, and texture are all direct determinants of the clinician’s tactile sensitivity during the scaling stroke.
Specifically, every Gracey Curette in our range uses surgical-grade stainless steel throughout. The steel grade maintains cutting edge sharpness across repeated sharpenings and sterilization cycles. Furthermore, all instruments withstand autoclave sterilization at 134°C in pre-vacuum cycles without blade deformation, shank bending, or handle corrosion. As a result, our Gracey Curette sets maintain full cutting performance throughout years of high-volume periodontal clinical use.
Specifically, curettes classify into several types based on cutting edge number, blade design, and tooth surface specificity. Understanding each curette type helps clinicians build a complete, logical periodontal instrument setup:
| Curette type | Cutting edges | Blade design | Best for | Key feature |
|---|---|---|---|---|
| Gracey Curette (area-specific) | Single lower edge | Offset 70°, curved | Specific tooth surface, all pocket depths | Auto-adapts to root surface at correct angle |
| Universal Curette | Two cutting edges | Perpendicular 90°, curved | Any tooth surface, general scaling | Two edges — fewer instruments needed |
| Columbia Curette | Two cutting edges | Large blade, 90° | Heavy supragingival and shallow subgingival calculus | Robust blade for tough calculus deposits |
| McCall Curette | Two cutting edges | Extended shank, 90° | Anterior and premolar subgingival scaling | Longer terminal shank for anterior pockets |
| Kramer-Nevins Curette | Single edge | Area-specific, fine | Anterior furcation and concavity access | Fine blade for tight anterior concavities |
| Langer Curette | Two cutting edges | Hybrid design | Posterior surfaces — simplified Gracey approach | Covers posterior in fewer instruments than full Gracey |
Therefore, the Gracey Curette is the most comprehensive and most clinically precise curette type available. No other curette design provides the same level of area-specific blade adaptation across every tooth surface in the full dentition. A complete periodontal instrument setup includes the full Gracey set as its primary scaling instruments, supplemented by universal curettes for anterior supragingival work.
Furthermore, curettes are available in standard and extended shank lengths. Standard shanks suit pockets up to 5–6 mm depth. Extended or after-five shank curettes suit deeper pockets — typically 5 mm and beyond. Moreover, mini-bladed curette variants use a blade that is half the standard blade length. Mini-blades access tight pockets, narrow roots, and furcation entrances where standard blades cannot enter cleanly. As a result, a complete Gracey Curette setup for specialist periodontal practice includes standard, extended shank, and mini-blade variants across the numbered series.
Specifically, the gracey curette uses in periodontal clinical practice cover every phase of non-surgical and surgical periodontal treatment:
The SRP curette instrument selection directly determines the completeness of root surface debridement. Specifically, a correctly selected Gracey Curette adapts its blade face to the full convex or concave root surface geometry. This adaptation places the cutting edge in contact with calculus at every point on the root surface during each stroke. In contrast, an incorrectly selected or incorrectly angled instrument contacts only a portion of the root surface. The remaining calculus drives ongoing periodontal inflammation. As a result, area-specific Gracey selection is a direct patient health decision — not a technique preference.
Moreover, thorough root planing using sharp Gracey Curettes is the most evidence-supported periodontal treatment available. Research consistently demonstrates that non-surgical SRP with sharp area-specific curettes produces significant probing depth reduction, bleeding on probing reduction, and clinical attachment level gain across all pocket depth categories. Furthermore, this outcome exceeds what blunt instruments, incorrect blade angulation, or universal curettes can achieve on posterior root surfaces. Consequently, the Gracey Curette set is not simply the best periodontal instrument available — it is the instrument on which the evidence base for non-surgical periodontal therapy is built.
Specifically, a sharp Gracey Curette removes calculus in controlled, deliberate strokes. Each stroke removes a predictable amount of calculus and cementum. A dull blade, however, requires more strokes, more force, and longer appointment time to achieve the same root surface cleanliness. Furthermore, excessive force from a dull blade produces more root surface gouging. It also causes more patient discomfort from the increased pressure required. Moreover, dull blades fatigue the clinician’s hand faster. As a result, sharpening Gracey Curettes before every appointment — or at minimum after every two to three patients — is a direct patient care standard, not an optional maintenance habit.
Furthermore, selecting the correct Gracey number for each tooth surface is the most commonly missed technique step among junior clinicians and dental students. Specifically, using Gracey 11/12 on a distal surface, or Gracey 13/14 on a mesial surface, produces the blade at the wrong angulation for the target surface. This error means the cutting edge contacts calculus at a suboptimal angle. The clinician must apply more force to achieve calculus removal. This extra force risks root gouging and patient discomfort. Therefore, always confirm the terminal shank is parallel to the tooth surface before applying any scaling force. This single check ensures correct surface-specific adaptation on every stroke.
Several curette instruments and scaling instruments exist for periodontal debridement. Understanding how the Gracey Curette compares to each helps clinicians make evidence-informed instrument selection decisions:
| Instrument | Cutting edges | Surface specificity | Subgingival safety | Limitation vs Gracey Curette |
|---|---|---|---|---|
| Gracey Curette (full set) | Single lower edge | Area-specific per instrument | Excellent — rounded toe | — |
| Universal Curette | Two edges | Non-specific — any surface | Good — rounded toe | Less precise posterior root adaptation |
| Sickle Scaler | Two edges | Non-specific | Poor — pointed tip lacerates | Supragingival only — not safe subgingivally |
| Hoe Scaler | Single edge | Non-specific | Limited | Cannot adapt to root concavities |
| File Scaler | Multiple edges | Non-specific | Limited | Cannot produce smooth root surface |
| Ultrasonic Scaler Tip | None — vibration | Non-specific | Good with correct tip | Cannot substitute for manual root planing in deep pockets |
Consequently, the Gracey Curette is the only standard periodontal instrument that combines subgingival safety, area-specific root adaptation, and single-edge cutting precision in a systematic numbered set. Ultrasonic scalers complement but do not replace the Gracey Curette for comprehensive root planing. Therefore, every periodontal instrument setup must include a complete Gracey set as its primary root planing instrument collection.
Before each scaling stroke, select the correct Gracey number for the target surface. Use Gracey 1/2 or 5/6 for anterior teeth. Use Gracey 7/8 for posterior buccal and lingual. Use Gracey 11/12 for posterior mesial. Use Gracey 13/14 for posterior distal. Hold the instrument in a modified pen grip. Place the thumb, index, and middle fingers on the handle. Rest the ring finger on an adjacent tooth or bony prominence. This ring finger fulcrum provides the stable support needed for controlled scaling stroke force.
Because the Gracey Curette contacts blood, calculus, and periodontal tissue in every procedure, correct sterilization between every patient is mandatory. All stainless steel Gracey Curettes in our range withstand autoclave sterilization at 134°C in pre-vacuum cycles. Furthermore, blade geometry and shank angulation remain consistent across hundreds of sterilization cycles without deformation or handle corrosion.
Moreover, ultrasonic pre-cleaning before autoclaving removes blood, calculus fragments, and biofilm from the blade, toe, and shank surfaces. Place all instruments in an enzyme-based ultrasonic solution for 10 minutes after each patient. Rinse thoroughly, dry completely, then bag and autoclave. As a result, consistent pre-cleaning prevents organic residue that accelerates blade corrosion and reduces the service life of the cutting edge between sharpenings.
However, sharpening is the most critical maintenance step for all curette instruments. Specifically, sharpen the Gracey Curette cutting edge before each appointment using a flat Arkansas stone or India stone. Maintain the original 70° blade-face-to-lateral-surface angle during sharpening. Do not sharpen the toe or the back of the blade. Furthermore, inspect the blade under magnification after sharpening — a sharp edge reflects no light from its cutting edge. A dull edge reflects a visible white line. Replace any Gracey Curette where sharpening has reduced the blade width by more than 50% of the original dimension. Similarly, periodontal clinicians follow instrument care guidance from the American Dental Association for all scaling instruments.
Our Gracey Curette range — including complete standard nine-pair sets (Gracey 1/2 through 13/14), extended shank variants (15/16 and 17/18), mini-bladed variants for furcation and deep pocket access, and individual instrument replacements — supplies periodontal specialist practices, general dental clinics, teaching hospitals, and dental instrument distributors across Lahore, Karachi, Islamabad, Multan, Peshawar, Faisalabad, Rawalpindi, and all major cities in Pakistan. Furthermore, periodontology departments at the University of Health Sciences Lahore, Dow University of Health Sciences Karachi, Nishtar Medical University Multan, and Khyber Medical University Peshawar use our Gracey Curette sets as standard teaching instruments in undergraduate and postgraduate periodontal treatment training programmes.
Because our Gracey Curettes originate from Sialkot — Pakistan’s internationally recognised precision surgical instruments manufacturing hub — they carry the blade hardness, shank geometry accuracy, and sterilization durability that both institutional periodontal departments and international export clients consistently require. Sialkot-manufactured periodontal instruments export to dental practices in over 100 countries. As a result, purchasing our Gracey Curette set delivers internationally benchmarked blade quality at competitive PKR pricing — making our set the highest-value periodontal instrument investment available in the Pakistani dental market.
Contact our team for current Gracey Curette Pakistan pricing, available set configurations, individual instrument availability, bulk order quotations for dental colleges and hospital periodontal departments, and delivery timelines for your clinic or institution.
What is a Gracey Curette and what is it used for?
Specifically, the Gracey Curette is an area-specific periodontal curette instrument used for subgingival scaling and root planing. Each numbered instrument in the set accesses specific tooth surfaces and arch positions. The offset blade — set at 70° to the lower shank — automatically adapts to the target root surface at the correct scaling angulation. Furthermore, the rounded blade toe allows safe subgingival insertion and exit without epithelial laceration. As a result, the Gracey Curette is the most precise and most evidence-supported instrument for non-surgical periodontal treatment available in clinical practice.
What are the gracey curette types and their uses?
The gracey curette types follow a numbered series. Gracey 1/2 and 3/4 suit anterior teeth. Gracey 5/6 accesses anterior and premolar surfaces. Gracey 7/8 and 9/10 suit posterior buccal and lingual surfaces. Gracey 11/12 — one of the most used instruments in the set — accesses posterior mesial surfaces. Gracey 13/14 accesses posterior distal surfaces. Furthermore, extended variants Gracey 15/16 and 17/18 suit deeper pockets and limited mouth opening cases. As a result, the complete set of nine standard pairs covers every tooth surface across the full dentition systematically.
What is the difference between Gracey Curette and universal curette?
The Gracey Curette has a single cutting edge — the lower edge only — and an offset blade at 70° to the lower shank. This area-specific design means each Gracey number suits only its designated tooth surface. In contrast, the universal curette has two cutting edges and a blade set at 90° to the lower shank. Consequently, the universal curette works on any surface from any approach direction. However, the Gracey produces superior root surface adaptation on posterior tooth concavities and complex root anatomy.
What is the correct blade angulation for the Gracey Curette?
Specifically, the Gracey Curette working angulation is 70–80° between the blade face and the root surface during the scaling stroke. This angulation differs from insertion angulation — the blade inserts at 0° (closed against the root) to enter the pocket safely. Once at the base of the pocket, the clinician rotates the blade to working angulation before applying lateral scaling force. Furthermore, the terminal shank parallel to the long axis of the tooth confirms correct angulation automatically.
Is the Gracey Curette set available in Pakistan and what is the price?
Yes, Gracey Curette Pakistan supply is available through our direct sales team and authorised dental instrument distributors in Lahore, Karachi, Islamabad, Multan, Peshawar, Faisalabad, and Rawalpindi. Because pricing in PKR depends on the set configuration — standard nine-pair set, extended shank variants, mini-bladed set, or complete specialist set — and order quantity, contact our sales team for a current quotation. Bulk orders for periodontal departments, dental colleges, and hospital outpatient periodontal clinics qualify for institutional pricing.
Can Gracey Curettes be autoclaved and how often should they be sharpened?
Yes. All stainless steel Gracey Curettes in our range withstand autoclave sterilization at 134°C in pre-vacuum cycles. Furthermore, ultrasonic pre-cleaning before every sterilization cycle removes blood, calculus, and biofilm from blade and shank surfaces.
For complete periodontal instrument setups, explore all dental instruments here: CLICK
Reviews
There are no reviews yet.