



₨150
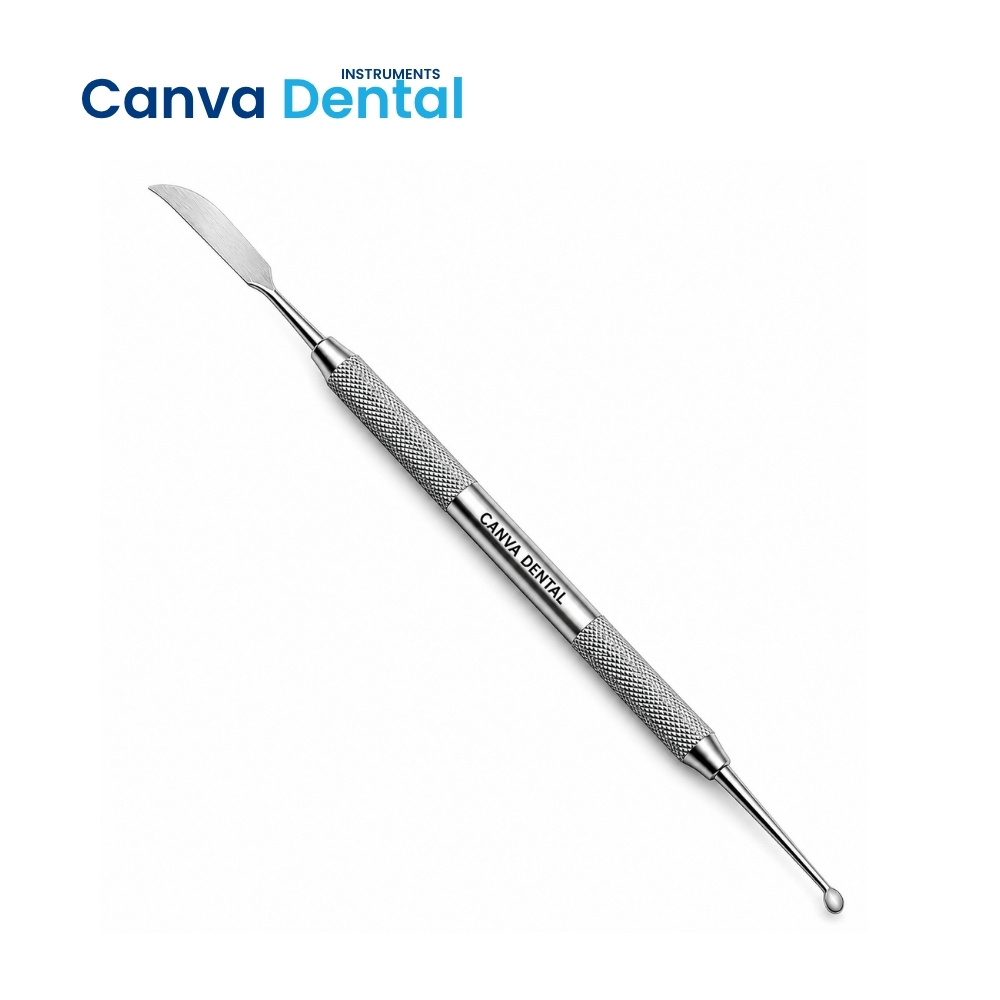
Dental wax carving instruments are essential tools in restorative dentistry, prosthodontics, and dental laboratory work. Dentists, dental students, and technicians use these instruments to shape, carve, and refine wax, amalgam, and restorative materials. Each carver produces a different surface form. Together, they create the occlusal anatomy, marginal ridges, and contact areas that make restorations function correctly. Because restoration anatomy directly affects occlusion and patient comfort, dental wax carving instruments remain indispensable in every restorative and prosthetic tray setup.
In addition, wax carver dental instruments serve across two different clinical contexts. At the chairside, they carve freshly placed amalgam and composite. In the laboratory, they shape wax patterns for indirect restorations. As a result, both clinical and technical dental teams use the same set of instruments across very different applications.
A carver dental instrument is a hand instrument with sharp working ends designed to remove small amounts of wax or restorative material. It creates tooth anatomy — cusps, fossae, marginal ridges, and embrasures — in freshly placed or wax materials. Unlike burnishers that smooth existing surfaces, carvers remove material to create form. Therefore, carvers produce the three-dimensional anatomy that a restoration requires. They are most active immediately after material placement, before final setting occurs.
The term “carver” applies to instruments used for both amalgam carving at the chairside and wax pattern carving in the laboratory. Consequently, the same instrument designs serve both contexts. The Hollenback carver, cleoid-discoid carver, and Weston carver all appear regularly on clinical restorative trays and laboratory benchtops alike.
Many students confuse carvers with burnishers. The distinction is simple. Carvers have sharp cutting edges. They remove material to create anatomy. Burnishers have smooth, blunt surfaces. They compress and polish existing material surfaces. Therefore, the workflow sequence places carvers before burnishers. The clinician carves anatomy first, then burnishes the surface smooth. Using a burnisher before carving prevents anatomy formation. Using a carver after setting removes too much material and damages the restoration.
Each dental wax carving instrument in our range delivers the blade sharpness, handle balance, and working end precision that restorative and prosthetic carving demands:
Several carver dental instrument designs exist. Each suits specific carving tasks, surface areas, and material types. Understanding the available types helps clinicians and technicians select the most appropriate instrument for every carving requirement:
| Carver Name | Working End Shape | Primary Application |
|---|---|---|
| Hollenback Carver | Angled blade with fine pointed tip | Occlusal anatomy carving in amalgam — most commonly used carver |
| Cleoid Carver | Claw-shaped pointed tip | Occlusal fossa carving, anatomy initiation in amalgam and wax |
| Discoid Carver | Disc-shaped flat blade | Smooth fossa floors, marginal ridge finishing, flat surface refinement |
| Cleoid-Discoid (Combined) | Claw tip + disc on one handle | Complete occlusal anatomy — most versatile double-ended design |
| Weston Carver | Curved blade, fine edge | Interproximal contact area carving and marginal ridge definition |
| Ward’s Waxing Instrument | Wide flat wax-spatula blade | Wax addition and contouring in prosthetic laboratory work |
| Interproximal Carver | Offset angled blade | Proximal surface carving, embrasure form, contact point refinement |
| PKT (Peter K. Thomas) Carver | Set of 5 numbered variants | Functional cusp wax-up technique in precision prosthetic work |
Therefore, stocking the cleoid-discoid carver, Hollenback carver, and a Weston or interproximal design covers the full range of routine restorative and prosthetic carving requirements without an excessive instrument inventory.
| Carver Type | Amalgam | Wax Pattern | Composite |
|---|---|---|---|
| Hollenback | Primary use | Suitable | Limited — before cure only |
| Cleoid-Discoid | Primary use | Excellent | Before cure only |
| Weston | Suitable | Excellent | Limited |
| Ward’s Waxing | Not suited | Primary use | Not suited |
| PKT Set | Not suited | Primary use | Not suited |
The complete range of dental carver uses extends across amalgam restorations, composite placements, prosthetic wax-ups, and dental laboratory work. Understanding all applications helps dental teams select the correct carver at each procedure stage:
Dental waxing instruments serve two distinct contexts. Understanding the difference helps dental teams build the correct instrument set for each setting.
At the chairside, dental wax carving instruments work on plastic restorative materials. Amalgam carving happens during the initial set phase. The material is soft enough to carve but firm enough to hold form. This window lasts approximately 3–5 minutes for amalgam. Therefore, chairside carvers need sharp edges and rapid stroke efficiency. The Hollenback and cleoid-discoid designs suit this environment best. Moreover, they are available in double-ended format. This reduces tray instrument count. Consequently, clinicians switch between blade designs rapidly during the carving window without instrument changes.
In the laboratory, dental waxing instruments shape dental wax and thermoplastic materials at slightly elevated temperatures. Warm wax is softer and more responsive to fine carver strokes. However, it also drags rather than cuts if the instrument is not sharp. Therefore, maintaining sharp carver edges is equally important in the laboratory context. In addition, laboratory waxing uses instruments like the Ward’s waxing instrument and PKT set that are not suited for chairside amalgam carving. These wider, spatula-type designs add wax in layered increments. They suit the deliberate, controlled wax addition technique that precise indirect restorations require.
The carver dental instrument and the dental burnisher are both restorative hand instruments. However, they perform opposite functions. Confusing them produces poor restoration outcomes:
| Feature | Carver Dental Instrument | Dental Burnisher |
|---|---|---|
| Working edge | Sharp cutting edge | Smooth, blunt surface |
| Function | Removes material to create anatomy | Compresses and smooths existing material |
| Used on amalgam | During initial set — carves anatomy | Before and after carving — smooths surface |
| Used on composite | Before light-curing | Before light-curing — blends margins |
| Used on wax | Primary wax shaping tool | Surface smoothing only |
| Working examples | Hollenback, cleoid-discoid, Weston | Egg burnisher, ball burnisher, beaver tail |
| Sequence position | After condensation — before burnishing | Before carving (pre-carve) and after (post-carve) |
Therefore, the correct restorative sequence for amalgam is: condense → pre-carve burnish → carve anatomy → post-carve burnish. Placing the carver in the correct sequence position produces restorations with better anatomy, better marginal seals, and better surface quality.
Hold the carver dental instrument in a modified pen grasp. Rest the ring finger as a fulcrum on a stable adjacent tooth. This provides controlled stroke delivery. Approach the restoration surface with the blade at 45–75 degrees to the material. A blade angle below 45 degrees slides over the surface. An angle above 90 degrees gouges rather than carves. Moreover, keep strokes short and deliberate. Long strokes remove too much material in one pass. Short, overlapping strokes produce more controlled anatomy definition.
Start carving at the occlusal margins. Remove any amalgam overhanging the cavity margins first. This confirms the restoration is not overextended before creating internal anatomy. Next, define the marginal ridges at the correct height. Then carve the central developmental groove. Finally, create the secondary and tertiary grooves and fossae. In addition, use the side of the blade rather than the tip for broad fossa carving. The tip suits fine groove definition. Consequently, switching between tip and blade side during the carving sequence produces better anatomical accuracy than using only one contact point throughout.
All stainless steel dental wax carving instruments in our range withstand autoclave cycles at 134°C. However, carver blade sharpness requires active maintenance. A dull carver drags through amalgam rather than cutting cleanly. This displaces material rather than removing it. Therefore, test each carver on a hard wax stick before every restorative session. A sharp blade cuts without resistance. A dull blade slides and skips. In addition, ultrasonic cleaning before autoclaving removes restorative material debris from the blade edges. This preserves sharpness and ensures complete sterilization penetration to all surfaces.
Sharpen dull carver edges with a flat Arkansas sharpening stone. Maintain the original blade bevel angle throughout sharpening. Altering the bevel angle changes how the blade contacts the restoration surface. This reduces carving efficiency and accuracy. Moreover, inspect blade tips under direct light for chips or rounded edges. Even minor tip damage produces ragged carving lines rather than clean groove definition. Replace instruments when sharpening no longer restores adequate cutting performance. Consequently, maintaining a sharp carver set directly improves restoration quality at every clinical appointment.
We supply dental wax carving instruments — including Hollenback, cleoid-discoid, Weston, interproximal, Ward’s waxing, and PKT designs in single and double-ended configurations — to restorative dental clinics, dental laboratories, prosthodontic departments, teaching hospitals, and instrument distributors across Lahore, Karachi, Islamabad, Multan, Peshawar, Faisalabad, Rawalpindi, and all major cities in Pakistan. Moreover, our institutional supply team handles bulk procurement for dental college restorative and prosthodontic departments at competitive pricing.
Contact our team for current dental wax carving instruments pricing in Pakistan, available designs, and delivery timelines for your clinic or institution.
Q: What are dental wax carving instruments used for?
Dental wax carving instruments create tooth anatomy in restorative materials and wax patterns. Primary dental carver uses include occlusal anatomy carving in amalgam, composite pre-cure shaping, marginal ridge definition, interproximal contact carving, and prosthetic wax pattern fabrication. Moreover, they serve in complete denture wax-ups, crown and inlay pattern carving, diagnostic wax-ups, and temporary crown anatomy refinement. Each carver dental instrument design suits a specific surface area and material type.
Q: What are the main types of wax carver dental instruments?
The main wax carver dental types include the Hollenback carver for amalgam occlusal carving, the cleoid-discoid carver for combined claw and disc anatomy work, the Weston carver for interproximal surface definition, Ward’s waxing instrument for laboratory wax addition, and the PKT set for precision prosthetic cusp wax-ups. In addition, the interproximal carver addresses proximal surface embrasure form. Stocking the cleoid-discoid and Hollenback designs covers the majority of routine chairside carving requirements.
Q: What is the difference between a carver dental instrument and a burnisher?
A carver dental instrument has sharp cutting edges. It removes material to create occlusal anatomy, grooves, and marginal ridges. A dental burnisher has smooth blunt surfaces. It compresses and polishes existing material without removing it. Therefore, the correct sequence places carving after condensation and before burnishing. Using a burnisher before carving prevents anatomy formation. Using a carver after burnishing removes the smoothed surface and requires reburnishing. Keeping the sequence correct — condense, pre-carve burnish, carve, post-carve burnish — produces the best restoration outcome.
Q: Can dental wax carving instruments be used on composite resin?
Yes — but only before light-curing. Composite resin sets hard when exposed to the curing light. Carvers shape uncured composite effectively. They remove excess material and define increment margins before each curing cycle. However, composite resists carving strokes completely after curing. Therefore, apply wax carver dental instruments to each composite increment immediately after placement. Shape and trim before activating the curing light. This approach eliminates the need for rotary finishing of poorly shaped increments after curing.
Q: Are dental wax carving instruments autoclavable?
Yes. All stainless steel dental wax carving instruments in our range withstand autoclave sterilization at 134°C.
Reviews
There are no reviews yet.